EHS Risk Mitigation
- Perform Job Hazard Assessment to identify fall hazards
- Perform an assessment on modifications to worksites where new hazards may exist
Affected Associate's Immediate Supervisor
- Take efforts to eliminate fall hazards,
- Where the fall hazard cannot be eliminated, provide fall protection,
- Ensure associate is trained and competent to access fall protection areas requiring fall restraint and fall arrest systems,
- Provide, periodically inspect, and maintain fall protection and fall prevention equipment in accordance with all safety standards and manufacturers recommendations.
Yaskawa Associate
- Notify Yaskawa Management if a potential fall hazard is identified,
- Only use approved equipment for climbing, in the purpose for which it is designed, and in the way for which it is approved,
- Use ladders only on clean, level, and dry surfaces,
- Use hand rails when climbing up and down stairs or working platforms where hand rails are provided,
- Only use fall restraint and fall arrest systems when certified to do so,
- Ensure dock doors are closed when there is not a truck at the door or other fall protection is in place.
Ladders
As part of the Job Hazard Assessment, and as part of Manufacturing Engineering, alternative methods for working from heights should be evaluated to eliminate the need for ladders as much as possible.
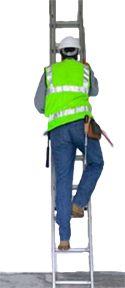
While working on a ladder:
DO
- Hold on
- Maintain 3 points of contact with the ladder at all times
- Keep centered with your belt buckle always between the uprights of the ladder
- Stay straight and close to the ladder
- Use a tool belt to carry tools or use a rope to hoist them up
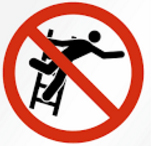
DON'T
- Lean too far
- Reach too high
- Try to reposition the ladder while on it
Ladder Inspection
- All ladders must be inspected for visible defects prior to each use
- Broken, damaged, or defective ladders shall be tagged and removed from service immediately.
- Prior to discarding a damaged or defective ladder, it shall be destroyed to prevent a person from pulling it from refuse and attempting to use it
- Ladders must only be used for their intended purpose
- All ladders must have equally spaced rungs and meet OSHA/ANSI requirements
- Ladders shall not be painted. Doing so can hide otherwise noticeable defects
- Ladders are to be kept free of oil, grease, ice, and all other slipping hazards. Associates shall clear mud, grease, etc. from their shoes before climbing a ladder.
- Ladders must be placed on a solid, level base unless secured to prevent accidental movement. Straight or extension ladders should be placed ad a 4 to 1 pitch (one foot out of every four feet in height)
- Ladder capacities must be verified that they will be appropriate for the task they are used for.
- The side rails of a portable ladder (e.g.: extension ladders) must extend at least 3 feet above the upper landing area that it serves. Ladders should be secured at the upper landing.
- All ladders used near electrical equipment shall have nonconductive side rails.
- The area around the top and bottom of ladders must be kept clear.
- Associates must never carry any object or load when climbing a latter. Carry tools in a belt or pouch or use a hand line to raise or lower them.
- Associates shall always maintain a three-point contact with the ladder. Keep two hands and one foot, or two feet and one hand on the ladder at all times.
- To prevent loss of balance, associates shall not reach out too far from a ladder in any direction - keep the belt buckle inside the rails.
- Move the ladder as the work requires. Never try to reposition a ladder while on it.
- Work facing the ladder and hold on with one hand - continuing to maintain three points of contact.
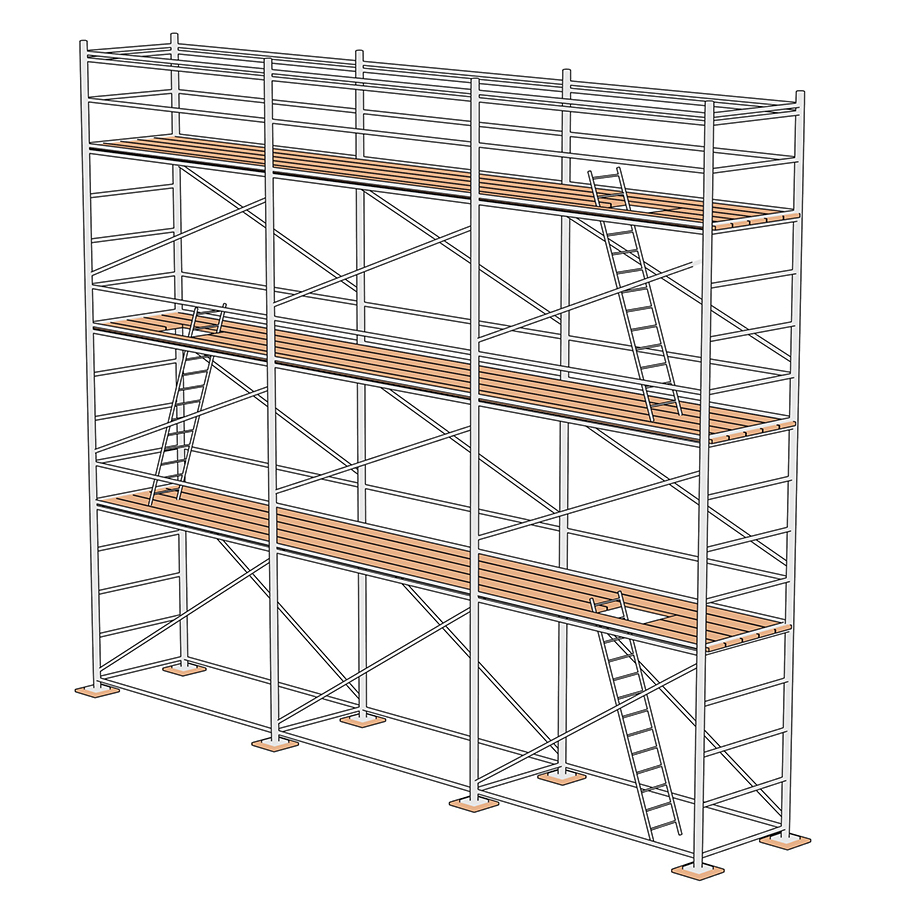
Scaffolds
OSHA defines a scaffold as: any temporary elevated platform (supported or suspended) and its supporting structure (including points of anchorage) use for supporting employees or materials, or both.
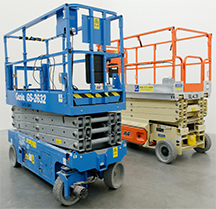
Scissor lifts are considered mobile scaffolds. All requirements defined in this section applies to scissor lifts.
Requirements
No Yaskawa America, Inc. Associate shall erect nor deconstruct a scaffold.
Associates who work on scaffolds shall be trained and qualified.
All scaffold components shall be inspected by a competent person before use and daily thereafter. Check for:
- cracks or bent parts,
- loose or damaged connectors,
- damaged or missing bracing,
- damaged or missing guard rails,
- damaged or missing access ladders
- damaged or unstable footings
Never use any equipment that is damaged.
- Guard rails (2"x4" - minimum 39" high) and toe boards (minimum 4" high) shall be installed on all open sides and ends of platforms more than ten feet above the ground or floor.
- Scaffolds four feet to ten feet high shall have standard guard rails installed on all open sides and ends of the platform.
- All scaffold working platforms must be fully planked or decked. All planking must be scaffold grade material, and extend over end supports not less than 6" or more than 12".
- An access ladder or equivalent means of safe access must be provided.
- Scaffold platforms must be kept free or rubbish and of snow, ice, oil, and grease.
Scissor Lift Requirements
All of the requirements for scaffolds apply to scissor lifts. Additionally, the following requirements apply:
- Yaskawa scissor lifts shall not be operated outdoors.
- Yaskawa scissor lift operators shall be qualified in both Powered Industrial Vehicles and Scaffold requirements included in scissor lift training
- If access of side of scissor lift does not have a toe board (common in rental and contractor units), the following precautions shall be taken:
- Items shall not be stored on the floor of the lift, and
- The area below the scissor lift working area shall be barricaded and people working within the barricaded area shall wear an approved hard hat or helmet.
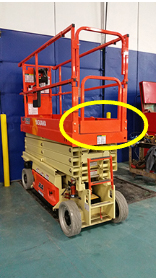
Scissor Lift has toe board at entry

Scissor lift does not have toe board at entry. Area below must be barricaded and personnel working below must wear hard hats.

Task Support Vehicles are another type of movable scaffold. No loose objects are to be stored at the base (at the operators feet). Operators working below, where objects might fall, must wear hard hats.
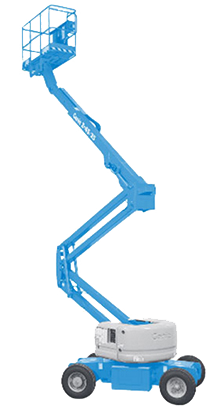
Boom lifts are covered by the OSHA Aerial Lift Standard.
No Yaskawa associate is qualified to operate a boom lift
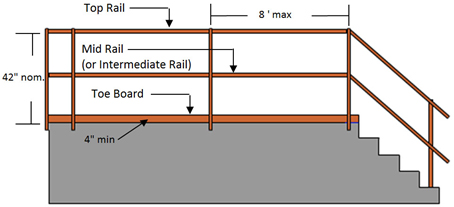
Guard Rails
Floor openings, roof openings, wall openings, open-sided floors, stairway, rams, platforms, and runways shall be guarded by a standard guard rail where the distance to the lower level is 4 feet or greater, or where at any height where a fall into a hazardous environment (electricity, equipment, etc.) is possible.
Standard guard rails must meet the following general conditions:
- A standard railing shall consist of top rail, intermediate rail, toe board, and posts,
- The top rail shall be smooth surfaced and shall have a vertical height of 39" - 45" from floor, platform, runway, or ramp level.
- The intermediate rail shall be halfway between the top rail and the floor, platform, runway, or ramp.
- A standard toe board shall be 4 inches minimum in vertical height from its top edge to level of the floor, platform, runway, or ramp.
- Railings shall have the strength to withstand at least the minimum requirement of 200 pounds top rail pressure with a minimum of deflection.
Fall Hazard Elimination
Secure footing is the prime requisite in avoiding falls and good housekeeping is essential to good footing. The following housekeeping rules shall be adhered by all Yaskawa associates:
- Maintain a clean and orderly workplace,
- Walkways shall be free of cords, material, and tripping hazards,
- Immediately clean up spills, oil, grease, water, etc. to prevent slipping,
- Always look before you step,
- Use adequate lighting,
- Never stand on chairs, crates, boxes, skids, or any other unstable object,
- Never walk over materials, skids, or boxes
- Proper footwear must be worn at all times.
Hierarchy of Fall Protection
BEST - Hazard Elimination
Yaskawa's first and best effort is always to eliminate the hazard. The reason for exposure is challenged and evaluated to determine if a change in procedure, practice, location, or equipment will eliminate exposure to the fall hazard.
SECOND BEST - Passive Fall Protection
Where the hazard cannot be eliminated, look to provide physical barriers like guardrails around unprotected edges and covers over holes.
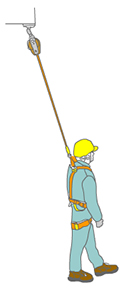
THIRD BEST - Fall Restraining
When used properly, fall restraint systems prevent falling. Fall restraint systems use PPE to restrict the worker's range of movement so they cannot physically travel to the fall hazard.
FOURTH BEST - Fall Arrest
Fall arrest systems do allow a person to fall, but the fall is stopped within acceptable force and clearance margins. Falling with a fall arrest system can still lead to injury.
LEAST EFFECTIVE - Administrative Controls
Administrative controls are work practices or procedures that increase a worker's awareness of the hazard. They do not provide a physical means of protection.
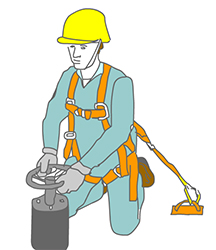
Personal Fall Protection
Personal fall protection used on order pickers and other powered industrial vehicles is covered in the Powered Industrial Vehicles Safety Policy.
Only trained Yaskawa qualified associates shall use fall restraint and fall arrest systems.
Approved body harnesses shall be worn where the possibility of a free fall exists. Body belts are strictly prohibited for fall protection purposes.
Shock absorbing lanyards shall be used as the connecting device between harness and anchorage of fall arrest systems.
Lanyards shall be a minimum of 1/2" nylon or equivalent with a maximum length to provide for a fall no greater than 6 feet. The lanyard shall have a nominal breaking strength of at least 5,000 pounds.
Lanyards shall be secured above the worker to an anchorage capable of supporting a minimum dead weight of 5,000 pounds.
Records
Scissor lift inspection records are maintained by the controlling cost center manager and shall be kept for the life of the equipment.
Training
Fall Protection Training is provided to all associates through Yaskawa's Learning Management System.
To become Yaskawa Qualified to use fall restraint and fall protection devices, the associate must be trained in the proper use of personal fall protection equipment and the procedure for prompt rescue of someone who has fallen.
This training must be verified and documented. At the completion of this training, the associate shall demonstrate their understanding of the requirements.
- Training for use of fall restraint and fall protection devices is provided by a qualified individual.
- Records of this training and the associates qualification is maintained in Yaskawa's Learning Management System or maintained by the associate's supervisor.
Revision History
| Rev # |
Description |
Release Date |
Approved by |
| 0 |
Initial Release |
4/14/2016 |
Thurwanger |
| 1 |
Added scaffolding requirements |
7/16/2017 |
Thurwanger |
| 2 |
Grammatical corrections |
9/12/2022 |
Thurwanger |
| 3 |
Added "No modifications shall be made to scissor lifts (movable work platforms) without first obtaining written permission from the equipment manufacturer" |
3/26/2025 |
Thurwanger |
| 4 |
Added "Wnen other methods of fall are not utilized" to meet Veriforce requirement |
7/9/2025 |
Thurwanger |
|
|
|
|
Program Review
| Review Date |
Reviewed by |
Changes Required (Yes/No) |
Revision # if updated |
| 2/15/2017 |
Thurwanger |
Yes |
1 |
| 1/12/2018 |
Thurwanger |
No |
|
| 1/18/2019 |
Thurwanger |
No |
|
| 1/14/2020 |
Thurwanger |
No |
|
| 1/26/2021 |
Thurwanger |
No |
|
| 1/18/2022 |
Thurwanger |
Yes |
2 |
| 1/13/2023 |
Thurwanger |
No |
|
| 1/16/2024 |
Thurwanger |
No |
|
| 1/21/2025 |
Thurwanger |
Yes |
3 |
| 2/9/2026 |
Thurwanger |
No |
|
|
|
|
|
|
|
|
|